The Nostalgic Story: The Scent of Saturday Mornings
If I close my eyes and let my mind wander back to the golden days of my childhood, the first thing that hits me isn’t a sight or a sound—it’s a smell. It’s the warm, yeasty, slightly sweet aroma of dough rising in my grandmother’s sun-drenched kitchen. To this day, that scent is my personal time machine, instantly transporting me back to a world where the biggest worry was whether I’d get the crust or the middle slice.
My grandmother, a woman of infinite patience and soft, flour-dusted hands, believed that bread was the heart of the home. She didn’t buy loaves wrapped in plastic from the grocery store. To her, that was a cardinal sin. “Bread,” she would say, tapping a wooden spoon on the counter for emphasis, “is life. You don’t outsource life.” Saturday mornings were our ritual. While the rest of the world was waking up to cartoons, I was standing on a sturdy oak stool, watching the magic unfold.
I remember the way the morning light filtered through the lace curtains, casting dancing shadows on the worn linoleum floor. The kitchen was always warm, heated not just by the oven but by the sheer love that seemed to radiate from the hearth. She would measure the flour not with a scale, but with a battered enamel cup that had seen better days. The milk was warmed on the stove until it was “just the temp of a baby’s bath,” a measurement I took years to understand scientifically but understood intuitively even then.
The magic moment was always the kneading. She’d turn the shaggy mess of dough onto the wooden board, and we would push and pull. It was a dance. “Push away, fold back, turn,” she’d chant. I’d try to mimic her rhythm, my small hands getting sticky and clumsy, but she never corrected me with frustration—only with a gentle guiding hand over mine. We would talk about everything and nothing. She told me stories of her own childhood, of times when butter was a luxury and sugar was saved for birthdays. In those moments, kneading that dough, I learned more about my family history than I ever did from a photo album.
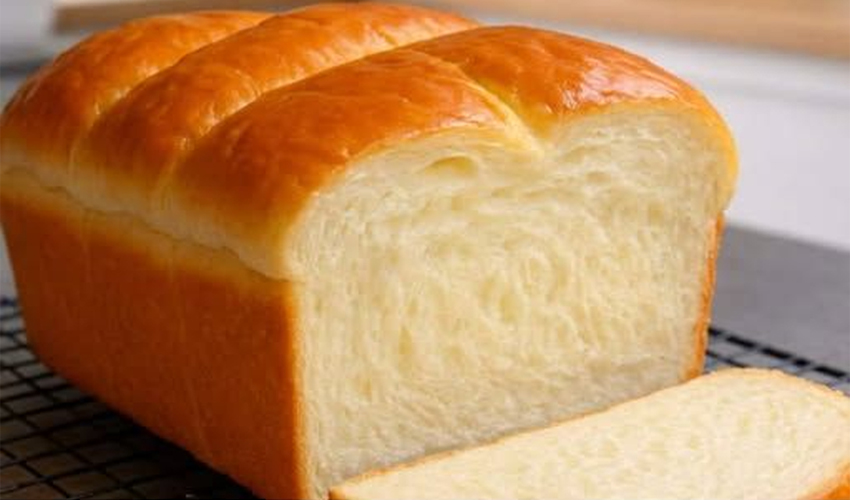
But the true reward was the wait. That agonizing, beautiful wait while the dough rose under a clean, damp tea towel. We’d sit at the table, sipping tea (mine was mostly milk and sugar), watching the cloth slowly dome upward like a breathing creature. And then, the bake. The transformation of pale, soft dough into a golden-brown masterpiece was nothing short of alchemy to my six-year-old eyes. When she finally pulled the loaf from the oven, the crust crackling softly as it cooled, the whole house felt like a hug. She would slice a thick piece, slather it with cold, salted butter that melted into golden pools, and hand it to me. That first bite—warm, pillowy, slightly sweet—was pure safety. It was love in edible form.
This recipe is my tribute to those Saturday mornings. It is an attempt to capture that feeling of safety, warmth, and homemade magic. It isn’t just flour and water; it’s a memory you can eat. When you bake this, you aren’t just making a sandwich carrier; you are recreating a legacy of comfort.
Why You’ll Love This Super Soft Homemade Sandwich Bread
- Cloud-Like Texture: This bread uses an enriched dough method that guarantees a crumb so soft it practically melts in your mouth, rivaling any premium quality bakery loaf.
- Budget-Friendly Gourmet: Stop paying $6 for “artisanal” loaves. This recipe costs pennies per slice and delivers a superior, authentic flavor profile.
- No Preservatives: Unlike store-bought bread laden with stabilizers, this recipe relies on wholesome, simple ingredients you can pronounce.
- Beginner-Proof: If you are terrified of yeast, don’t be! This recipe is designed with professional cooking techniques simplified for the home baker to ensure a perfect rise every time.
- Versatile Wonder: It toasts beautifully, makes the best French toast of your life, and holds up to heavy sandwich fillings without falling apart.
- Freezer Friendly: Bake a double batch and freeze one loaf. It thaws perfectly, ensuring you always have easy family dinners ready to go.
Ingredients You’ll Need
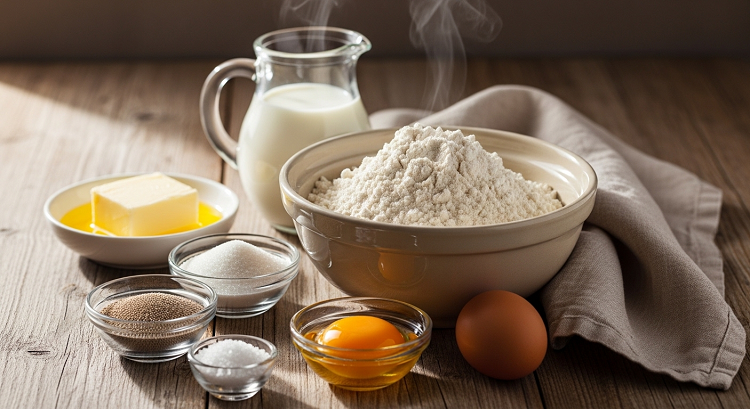
- 3 1/4 cups All-Purpose Flour: The backbone of your bread. All-purpose flour provides the perfect balance of protein (gluten) for structure and starch for softness. It creates a tender crumb that isn’t too chewy.
Substitution tip: You can use Bread Flour for a chewier texture and slightly higher rise, but All-Purpose is best for that classic soft sandwich feel. - 1 packet (2 1/4 tsp) Active Dry Yeast: The biological leavening agent that makes the bread rise. It feeds on the sugar and releases carbon dioxide bubbles, creating the airy texture.
Substitution tip: Instant Yeast works perfectly too; just skip the “blooming” step and mix it directly into the flour. - 3 tbsp Sugar: Sugar does three things: it feeds the yeast, tenderizes the crumb by retaining moisture, and contributes to that beautiful golden-brown crust through caramelization.
Substitution tip: Honey or maple syrup can be used for a more floral, earthy sweetness, but stick to 3 tablespoons. - 1 tsp Salt: Crucial for flavor development and controlling the yeast fermentation so the dough doesn’t rise too fast and collapse.
Substitution tip: Sea salt or kosher salt is great, but if using coarse salt, increase the volume slightly to 1.25 tsp. - 1 cup Warm Milk (110°F/43°C): Milk enriches the dough with fat and sugar (lactose), creating a velvety texture and a darker crust than water. The temperature is key—too hot kills the yeast; too cold sleeps it.
Substitution tip: For a dairy-free version, unsweetened almond or oat milk works, though the bread may be slightly less rich. - 1/4 cup Unsalted Butter, Melted: Fat coats the gluten strands, preventing them from becoming too tough. This is the secret to the “super soft” texture.
Substitution tip: Vegetable oil or light olive oil can be used for a dairy-free option, but butter offers the best flavor. - 1 large Egg, Room Temperature: Eggs provide structure, richness, and color. The lecithin in the yolk acts as a natural emulsifier, binding the fat and water for a cohesive dough.
Substitution tip: For an egg-free loaf, substitute with 1/4 cup of plain yogurt or simply increase the milk by roughly 3 tablespoons.
Equipment You’ll Need
- Stand Mixer with Dough Hook: Makes kneading effortless and ensures the gluten is fully developed for that professional cooking technique stretch.
- Large Mixing Bowl: If kneading by hand, you need plenty of space to mix without making a mess.
- 9×5 inch Loaf Pan: The standard size for a high-rising sandwich loaf. Metal pans conduct heat best for browning.
- Digital Thermometer: Essential for checking milk temperature (110°F) and bread doneness (190°F internal).
- Kitchen Towel or Plastic Wrap: To cover the dough during the rise, preventing a dry skin from forming.
- Cooling Rack: Critical for preventing a soggy bottom by allowing air to circulate around the cooling loaf.
Step-by-Step Instructions
Step 1: Activate the Yeast
In the bowl of your stand mixer (or a large bowl), pour in the 1 cup of warm milk. It should feel like a comfortable bathwater temperature—warm to the touch but not stinging. Stir in the 3 tbsp of sugar. Sprinkle the 1 packet of active dry yeast over the top and give it a gentle stir. Let it sit for 5-10 minutes.
Sensory Cue: You will know it’s ready when it smells nutty and beer-like, and a thick, creamy foam has formed on the surface.
Troubleshooting Tip: If the mixture doesn’t foam, your yeast is dead or the milk was too hot. Do not proceed! Start over with fresh yeast.
Step 2: Mix the Dough
Once the yeast is foamy, add the melted butter, room temperature egg, and 1 tsp salt. Whisk these wet ingredients together until the egg is fully broken up. Attach the dough hook to your mixer. With the mixer on low speed, gradually add the 3 1/4 cups of flour, about half a cup at a time.
Visual Cue: The dough will look shaggy at first, like a messy rag, but will slowly start to pull together into a ball.
Step 3: The Knead
Increase the mixer speed to medium-low. Let the machine knead the dough for 5-7 minutes. If you are kneading by hand, turn the dough onto a floured surface and knead rhythmically for 8-10 minutes. You want to push the dough away with the heel of your hand, fold it back, and turn.
Sensory Cue: The dough should transform from a sticky mess to a smooth, elastic, and slightly tacky (like the back of a Post-it note) ball. It should clear the sides of the bowl cleanly.
Pro Tip: Perform the “Windowpane Test.” Pinch a small piece of dough and gently stretch it into a square. If it stretches thin enough to let light through without tearing, your gluten is perfectly developed.
Step 4: The First Rise (Bulk Fermentation)
Lightly grease a large bowl with oil or cooking spray. Place your dough ball inside and roll it around so it’s coated in oil (this prevents drying). Cover the bowl with a warm, damp towel or plastic wrap. Place it in a warm, draft-free spot.
Time: Let it rise for 60-90 minutes, or until it has doubled in size.
Visual Cue: Use your finger to gently poke the dough about half an inch deep. If the indentation stays and doesn’t spring back immediately, it is ready.
Step 5: Shape the Loaf
Punch the dough down gently to release the air bubbles. Turn it onto a lightly floured surface. Press the dough into a rectangle, roughly the width of your loaf pan (about 8 inches wide). Roll the dough up tightly into a log, tucking the ends underneath to create a smooth seam. Pinch the seam closed tightly to prevent it from unraveling.
Troubleshooting Tip: If the dough keeps springing back while you try to shape it, let it rest for 5 minutes to relax the gluten, then try again.
Step 6: The Second Rise
Place the shaped log, seam-side down, into your greased 9×5 inch loaf pan. Cover it loosely with greased plastic wrap. Let it rise again in a warm place for about 30-45 minutes.
Visual Cue: The dough should rise about 1 inch above the rim of the pan. It should look puffy and proud.
Step 7: Bake to Perfection
Preheat your oven to 350°F (175°C). Place the loaf in the center of the oven. Bake for 30-35 minutes.
Sensory Cue: Your kitchen will smell irresistibly of butter and toasted yeast. The top should be a deep golden brown.
Pro Tip: Tap the top of the bread; it should sound hollow. For absolute precision, insert a digital thermometer into the center—it should read between 190°F and 200°F.
Step 8: Cool
Remove the bread from the oven. Immediately brush the top with a little extra melted butter for a soft crust. Let it cool in the pan for 10 minutes, then turn it out onto a wire rack to cool completely before slicing.
Warning: Slicing warm bread releases steam and can make the crumb gummy. Wait at least an hour!
Pro Tips for a Perfect Loaf
- Room Temperature Ingredients: Ensure your egg and butter are not cold. Cold ingredients can shock the yeast and slow down the rise, affecting the final texture.
- Don’t Over-Flour: When kneading by hand, resist the urge to dump more flour on the counter. A slightly sticky dough makes for a softer bread. Use a bench scraper to handle sticky dough instead of adding more flour.
- The Steam Hack: For a better oven spring, place a small tray of water on the bottom rack of your oven while preheating. The steam keeps the crust soft initially, allowing the bread to expand fully before the crust sets.
- Milk Powder Secret: Add 2 tablespoons of dry milk powder to the dry ingredients. This bakery secret adds richness and helps the loaf stay soft for days longer.
- Weigh Your Flour: If you have a kitchen scale, use it. 3 1/4 cups of flour is approximately 415 grams. Scooping with a cup can compact the flour, leading to a dry loaf.
Ingredient Notes: The Science of Softness
Creating gourmet recipes like this isn’t magic; it’s chemistry. Understanding your ingredients empowers you to bake better.
The Role of Fat (Butter & Egg): In lean doughs (like baguettes), there is no fat, resulting in a chewy, crusty texture. In this recipe, the lipids from the butter and egg yolk coat the protein strands (gluten) in the flour. This “shortens” the gluten strands, preventing them from forming a tough network. The result is a crumb that is tender, tight, and velvety—perfect for sandwiches.
The Milk Factor: Milk contains lactose, a sugar that yeast cannot ferment. This residual sugar stays in the dough, contributing to a subtle sweetness and promoting the Maillard reaction—the chemical process that gives your bread that stunning golden-brown crust. The proteins in milk also reinforce the structure, helping the bread rise high without collapsing.
Yeast Fermentation: The yeast is eating the sucrose (table sugar) and excreting carbon dioxide and alcohol. The gas gets trapped in the gluten network, inflating the dough like a balloon. The alcohol evaporates during baking but leaves behind that distinct, fermented “bread” flavor we all love.
Tips for the Best Recipe Success
- Patience is Key: Do not rush the rise. If your house is cold, the rise might take 2 hours. That’s okay. Let the dough dictate the schedule, not the clock.
- Tent with Foil: If the top of your bread is browning too quickly but the inside isn’t done (check your thermometer), loosely tent a piece of aluminum foil over the top for the last 10 minutes of baking.
- Butter the Crust: Brushing butter on the hot loaf immediately after baking softens the crust. If you prefer a crispy crust, skip this step.
Equipment Alternatives
Don’t have a fancy stand mixer or a loaf pan? You can still make best healthy alternatives to store-bought bread with basic tools.
- No Stand Mixer? Use a sturdy wooden spoon to mix the ingredients until difficult, then switch to your hands. Hand-kneading is therapeutic and effective. It just takes a bit of elbow grease!
- No Loaf Pan? You can shape this dough into a round boule or oval loaf and bake it on a regular baking sheet lined with parchment paper. It won’t have the square sandwich shape, but it will taste just as delicious.
- No Thermometer? Use the “hollow tap” test. Flip the bread out of the pan (using a towel to hold it) and tap the bottom with your knuckles. If it sounds like a hollow wooden box, it’s done. If it thuds, it needs 5 more minutes.
Flavor Variations to Try
Once you master the master recipe, try these variations for budget-friendly gourmet twists:
- Cinnamon Swirl Bread: Before rolling the dough into a log, brush the rectangle with melted butter and sprinkle heavily with cinnamon and brown sugar. Bake as directed for a breakfast treat.
- Herbed Garlic Bread: Add 1 tablespoon of dried rosemary or thyme and 1 teaspoon of garlic powder to the flour mixture. This makes incredible savory toast or sandwich bread for turkey clubs.
- Cheesy Jalapeño Loaf: Fold in 1 cup of shredded cheddar cheese and 2 tablespoons of diced pickled jalapeños during the last minute of kneading.
- Whole Wheat Hybrid: Swap 1.5 cups of the all-purpose flour for whole wheat flour. You may need an extra splash of milk as whole wheat absorbs more liquid.
- Honey Oat Bread: Swap the sugar for honey and add 1/2 cup of rolled oats to the dough. Sprinkle extra oats on top before baking for a rustic look.
Final Thoughts
There is something profoundly grounding about pulling a loaf of hot, fresh bread from your own oven. In a world that moves too fast, taking the time to measure, knead, and wait is a radical act of self-care. This super soft homemade sandwich bread isn’t just a recipe; it’s a way to slow down and nourish yourself and the people you love.
So, grab your flour, warm up that milk, and get ready to impress yourself. You are about to bake the best slice of bread you have ever tasted. Happy baking!
Frequently Asked Questions (Q&A)
Q: Can I use instant yeast instead of active dry yeast?
A: Yes! If using instant yeast, use the same amount (2 1/4 tsp). You do not need to dissolve it in the warm milk first; you can mix it directly into the flour. However, warming the milk is still necessary to help the dough rise efficiently.
Q: My dough is too sticky to handle. What did I do wrong?
A: Humidity, flour brand, and even the size of your egg can affect moisture. If it’s unmanageable, add 1 tablespoon of flour at a time until it’s workable. However, remember that sticky dough creates softer bread, so try to work with it using oiled hands rather than drying it out with too much flour.
Q: Can I make this recipe dairy-free?
A: Absolutely. To make this one of the best healthy alternatives for dairy-free diets, substitute the milk with oat milk or soy milk, and use plant-based butter or oil in place of the dairy butter. The texture will still be wonderfully soft.
Q: How do I store this bread to keep it soft?
A: Since there are no preservatives, homemade bread dries out faster. Store it in a plastic bag or bread box at room temperature for up to 3 days. Do not refrigerate it, as the cold air accelerates staling. For longer storage, slice the loaf and freeze it in a freezer-safe bag for up to 3 months.
Q: Why did my bread crumble when I sliced it?
A: You likely sliced it while it was still too hot! The starch molecules need time to set and gelatinize as the bread cools. Cutting it too early disrupts this structure, leading to a gummy or crumbly texture. Patience is the hardest ingredient!
Q: Can I double this recipe?
A: Yes, this recipe doubles easily to make two loaves. You can use the same mixing times, but you may need a slightly larger bowl for the rising phase. It is perfect for meal prepping easy family dinners.
Q: Is this recipe suitable for a bread machine?
A: Yes! Add the liquid ingredients first (milk, melted butter, egg), then the dry ingredients (flour, sugar, salt), and make a small well for the yeast on top. Use the “White Bread” or “Basic” setting on your machine.